If you’ve ever admired a tiled wall or floor that looks perfectly aligned, smooth, and professional — the secret lies in one small detail: tile spacers. These tiny tools play a big role in tile installation by keeping even grout lines and ensuring a neat, long-lasting finish.
Whether you want a seamless modern look or a bold patterned design, choosing the right tile spacer size makes all the difference. In this complete guide, you’ll learn what tile spacers are, how to use them correctly, and which size works best for your bathroom, kitchen, or outdoor flooring.
🔹 What Are Tile Spacers and Why Are They Important?
Tile spacers are small plastic pieces — usually shaped like crosses, “T”s, or wedges — used during tile installation to maintain uniform gaps between tiles. These gaps allow grout to fill evenly, giving a balanced and symmetrical look.
But that’s not all. Correct grout line spacing helps tiles expand and contract naturally with temperature changes, preventing cracks, chipping, or lifting over time.
Skipping spacers may seem like a shortcut, but it usually results in misaligned tiles, uneven joints, and a poor finish.
In short, tile spacers ensure:
- Even spacing and perfect alignment
- Better durability and structural balance
- A professional, designer-level finish
🔹 Tile Spacer Size Guide: Choosing the Right Size for Your Project
Picking the correct tile spacer size affects both aesthetics and strength. Here’s how each size influences your design and where it works best:
1mm Tile Spacers – Sleek and Modern Look
Perfect for a seamless, minimal appearance where grout lines are barely visible.
✅ Ideal for: Bathroom walls, kitchen backsplashes, or modern interiors
✅ Look: Smooth, continuous surface with very thin joints
2mm Tile Spacers – Balanced and All-Purpose
The most versatile option for both walls and floors. It offers a neat, balanced look without making grout lines too wide or too tight.
✅ Ideal for: Medium wall and floor tiles
✅ Look: Clean and uniform, suitable for most home projects
3mm Tile Spacers – Defined and Stylish
Slightly wider gaps that make grout lines more noticeable, adding character and depth to the design.
✅ Ideal for: Rustic, patterned, or decorative tiles
✅ Look: Strongly defined lines that highlight each tile individually
4mm Tile Spacers – Durable and Practical
Best suited for large tiles, outdoor flooring, or uneven surfaces. The wider joints allow flexibility during installation and prevent cracks.
✅ Ideal for: Heavy-use areas like patios, driveways, or living room floors
✅ Look: Bold, structured, and robust
🔹 How to Use Tile Spacers: Step-by-Step Installation Guide
Using tile spacers the right way ensures professional results. Here’s a simple, step-by-step tile spacer installation guide:
Step 1: Plan Your Layout
Before applying adhesive, dry-lay your tiles to visualise the layout. Mark the centre of the surface to maintain symmetry and avoid small cuts near edges.
Step 2: Prepare the Surface
Clean the surface and ensure it’s level. Mix your tile adhesive or mortar as per instructions and spread it evenly with a notched trowel.
Step 3: Place the First Tile
Press the first tile into the adhesive and check its level. This will act as your reference point for the rest of the layout.
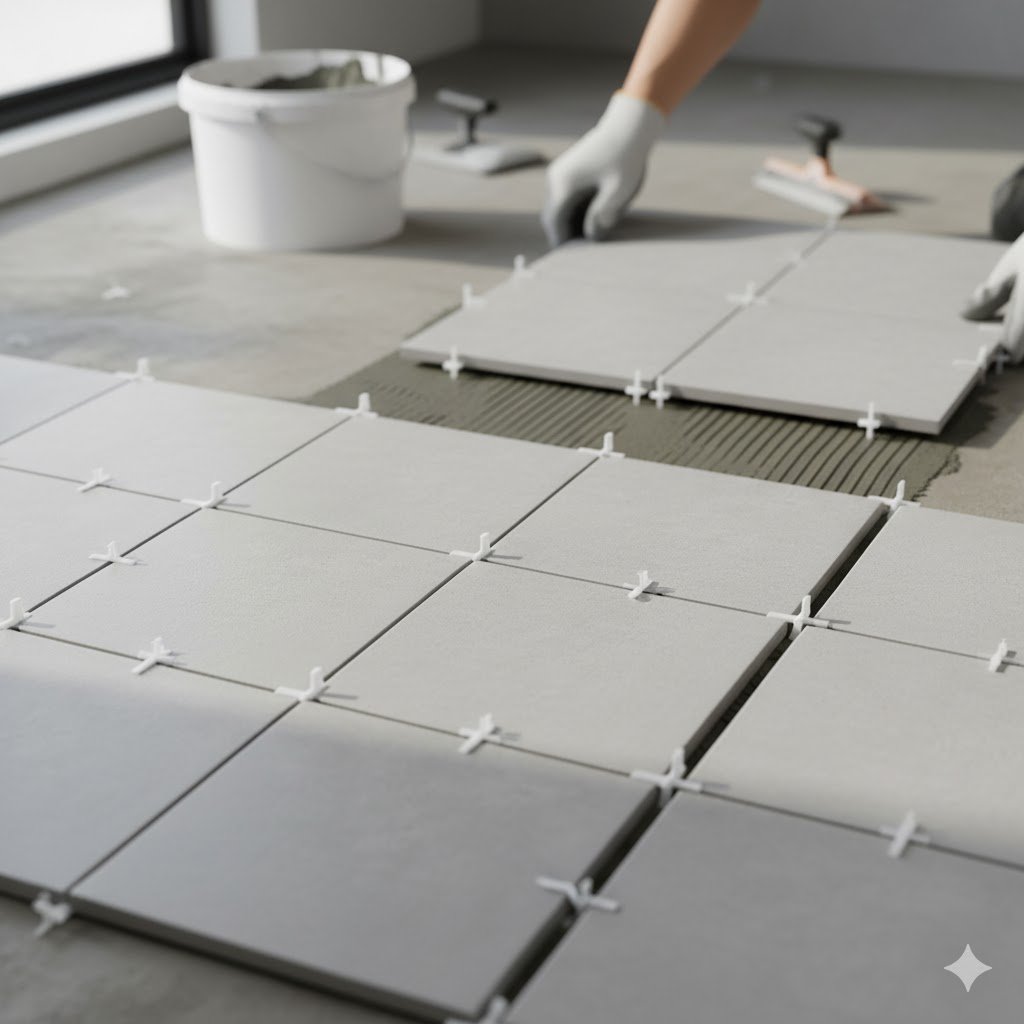
Step 4: Insert Tile Spacers
Place spacers at the corners or sides of each tile, depending on the pattern.
- Use X-shaped spacers for grid layouts (where four tiles meet).
- Use T-shaped spacers for staggered or brick patterns.
Ensure spacers are upright and firmly set against the tile edges.
Step 5: Continue Laying Tiles
Work in small sections. Place each new tile next to the previous one, using spacers to maintain even gaps. Always check alignment with a spirit level.
Step 6: Check and Adjust
Every few rows, step back and inspect the lines. Adjust tiles or spacers if anything looks uneven.
Step 7: Cutting and Edges
Use a tile cutter or wet saw for clean cuts at edges or corners. Continue using spacers to keep grout lines uniform.
Step 8: Let the Adhesive Set
Allow the adhesive to dry for at least 24 hours. Remove the spacers after 12–24 hours — once the tiles are stable but not fully hardened.
Step 9: Grout and Finish
Fill the gaps with grout using a rubber float at a 45° angle. Wipe off excess grout with a damp sponge and let it cure completely. Apply a grout sealer if needed.
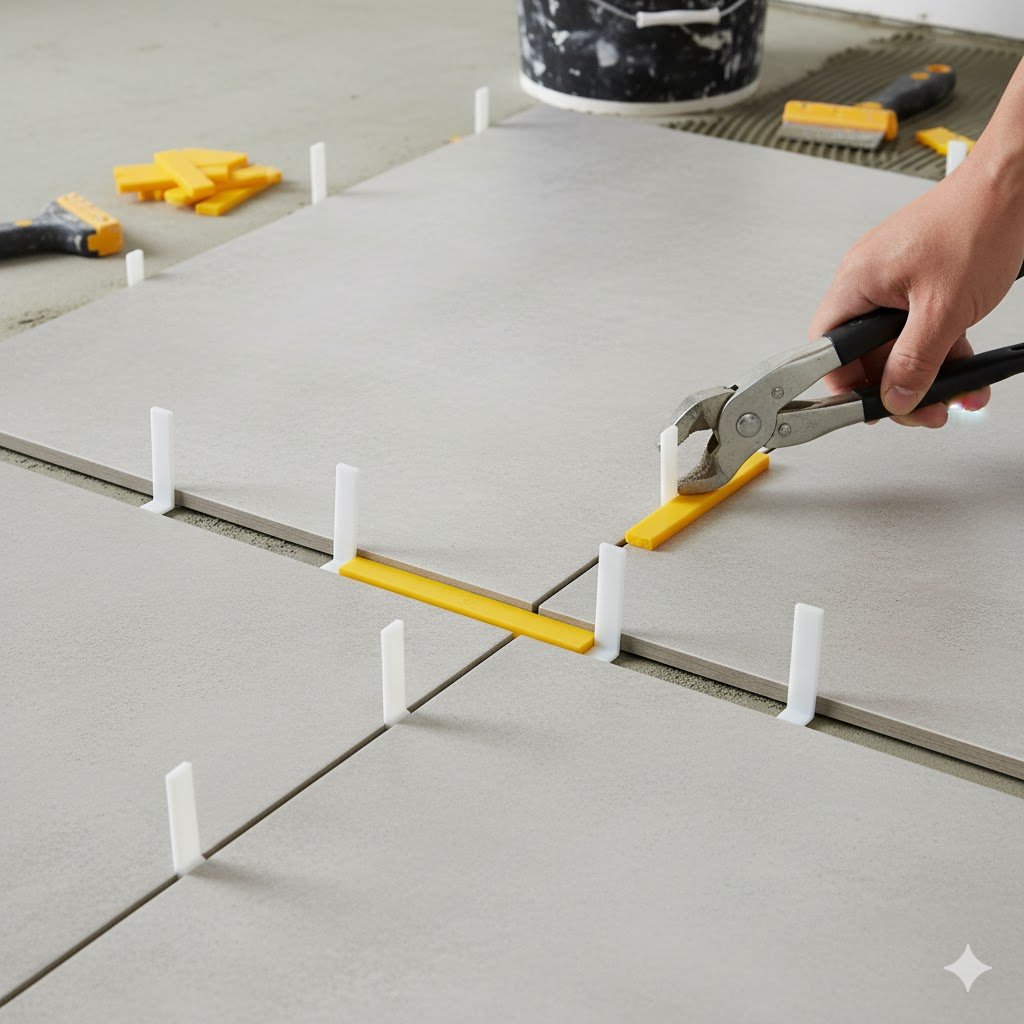
🔹 What Is a Tile Levelling System (and Do You Need One)?
A tile levelling system ensures all tiles remain perfectly flat and aligned. It uses clips and wedges to hold tiles in place as the adhesive dries, preventing uneven edges (lippage).
It’s especially useful for:
- Large-format tiles
- Slightly uneven floors or walls
- Professional-grade, ultra-flat finishes
For best results, use a levelling system along with tile spacers to achieve a perfectly smooth and durable surface.
🔹 Where Can Tile Spacers Be Used?
Tile spacers are suitable for almost every tiling project, including:
- Bathroom floors and walls: Keeps tiles aligned for a clean, waterproof look
- Kitchen backsplashes: Ensures straight grout lines in small decorative areas
- Living rooms: Perfect for floor tiles that need even spacing
- Countertops: Maintains uniform joints for tiled worktops
- Outdoor patios and walkways: 3mm–4mm spacers help handle weather expansion
They’re compatible with all tile materials — ceramic, porcelain, vitrified, glass, or stone.
🔹 Common Tile Spacer Mistakes (and How to Avoid Them)
| Mistake | Problem | How to Avoid |
|---|---|---|
| Using wrong spacer size | Unbalanced or uneven grout lines | Test different sizes before starting |
| Skipping layout planning | Uneven spacing, awkward cuts | Dry-lay tiles and mark the centre line |
| Misplacing or missing spacers | Gaps vary between tiles | Insert spacers at every tile corner |
| Leaving spacers too long | Hard to remove, damages grout | Remove after 12–24 hours |
| Ignoring levelling | Uneven tile height (lippage) | Combine spacers with a levelling system |
| Not checking alignment | Crooked grout lines | Use a level after every few tiles |
| Adhesive drying on spacers | Difficult to clean or reuse | Wipe off excess adhesive immediately |
🔹 Flawless Tiling Starts with the Right Spacers
The difference between a decent tiling job and a stunning one often comes down to precision. And precision starts with tile spacers.
Here’s a quick recap:
- 1mm: Sleek, seamless walls
- 2mm: Perfect for everyday tiling
- 3mm: Adds character and depth
- 4mm: Best for strength and outdoor use
With the right spacer size, proper planning, and careful alignment, your tiles will look professional and stay durable for years.
For premium-quality spacers and designer tiles, visit Durga Marble, Shop No. 19, Chulkana Road, Samalkha. We offer a wide range of tiles and accessories to help you achieve the perfect finish for any space.
🔹 FAQs About Tile Spacers
Q. What happens if I don’t use tile spacers?
Tiles may shift, causing uneven grout lines or cracks. Spacers prevent this by maintaining equal gaps.
Q. Can I reuse tile spacers?
Yes. Clean them before adhesive dries and store them properly for future use.
Q. What’s the difference between X and T spacers?
X spacers are for corners where four tiles meet, while T spacers are used for staggered layouts.
Q. Are tile spacers waterproof?
They’re made of durable plastic but are removed before grouting. The grout layer ensures waterproofing.
Q. Can I use spacers outdoors?
Yes. Use 3mm or 4mm spacers for outdoor floors to allow for expansion and contraction due to weather changes.
Q. What is the smallest tile spacer size?
1mm spacers are the smallest, perfect for achieving a near-seamless modern finish.
Q. Do I need a levelling system along with spacers?
For large tiles or uneven floors, yes — it ensures tiles remain flat and aligned for a smooth surface.

Harsh Sharma is a seasoned tile and marble expert from Samalkha, Haryana. A BBA graduate, Harsh has been immersed in the world of tiles since childhood, gaining extensive knowledge and hands-on experience in the industry.
Currently, he manages operations at his family business, Durga Marble, alongside his father, overseeing all aspects of the enterprise with dedication and expertise. Through his writings on the Durga Marble website, Harsh shares his in-depth insights on tiles, flooring, and home décor, helping homeowners, designers, and enthusiasts make informed decisions.
Passionate about educating others, Harsh combines professional experience with a practical understanding of tiles, offering clear, reliable, and actionable guidance to readers across India.